
Dell is a computer company that has been supplying computers since 1984 for both business and personal use. Dell company is owned by Dell Technologies. This post will discuss in detail about Dell motherboards, difference between Inspiron, Vostro & OptiPlex, how to screenshot on dell, Bios Key.
Difference between Inspiron, Vostro & OptiPlex Dell Desktops and Laptops
The three variants of Dell personal computers, configured for different categories of consumers are:
Fig. 1 – Introduction to DellÂ
- Inspiron Desktops and Laptops
- Vostro Desktops and Laptops
- OptiPlex Desktops and Laptops
Inspiron Desktops and Laptops
It is Dell’s variant of the computer that includes personal desktops and laptops aimed at students and basic users. Also, The Inspiron Dell desktops run Microsoft’s Windows 7 operating system. In terms of memory capacity, the Inspiron offers 500 GB, 750 GB, and 1000 GB of storage.
New models of Inspiron Laptops comes with Windows 11 Home, 11th Generation Intel® Core™ i5-11320H Processor, 512 GB SSD.
Vostro Desktops and Laptops
This is Dell’s variant designed for small businesses. Also, the Vostro Desktop runs the professional variant of Windows 7. The Vostro offers 250 GB, 320 GB, and 500 GB.
Some of the Vostro Laptops have 11th Generation Intel® Core™ i5-11320H Processor, Windows 11 Home/Pro, 256GB SSD, and 39.6 inch display.
OptiPlex Desktops and All-in-One PC
It is designed keeping in mind the large business and education market. Further, OptiPlex desktop runs on Windows 7 Pro operating systems. It offers five choices. They are 160 GB, 250 GB, 320 GB, 500 GB and 1000 GB.
New models of OptiPlex All-in-One PC’s and Desktop Towers comes with 11th Generation Intel® Core™ i5-11500T, Acceleration Use Only Intel® Core™ i5-11500 respectively. Also, Tower PC’s have 3.5 inch 1TB 7200rpm SATA Hard Disk Drive and All-in-One’s with 2.5 inch 1TB 7200rpm SATA Hard Disk Drive.
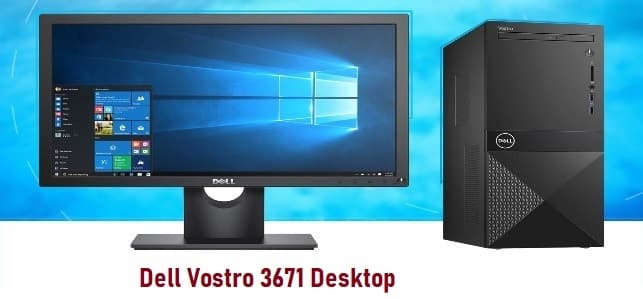
Fig. 2 – Vostro Desktop
Dell Financial Services
Dell Financial Services is a division of Dell Technologies that provides creative payment and usage solutions. It offers a wide range of finances that include Dell Preferred Account, DFS Business Leases, and DFS Business Credit. The DellPreferred Account is a consumer credit line issued to consumers for the purchase of various its products.
The DFS Business leases are issued to companies to help them lease IT maintenance, upgrades, support during the lease period and to renew outdated technology to the new technology at affordable rates. Additionally, the DFS Business Credit is the revolving credit line issued to companies that give them more power to meet technology needs.
Dell Preferred Account
Dell Preferred Account is similar to retail credit cards. It is revolving credit line issued to consumers by WebBank that helps in financing your Dell’s purchases from initial purchase to add on such as peripherals, software, or another system up to the limit of your credit available on your account. It can be used to shop online at Dell.com or for refurbished products at DFSDirectSales.com or DellOutlet.com.
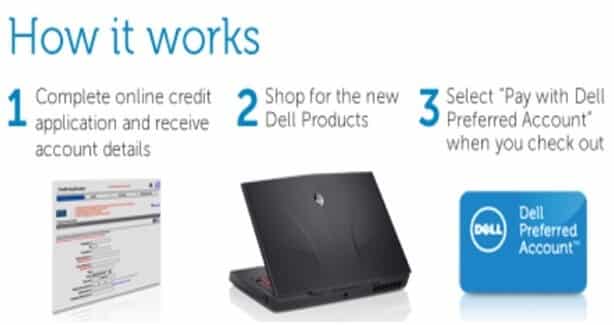
Fig. 3 – Dell Preferred Account
How to Screenshot on Dell Desktop and Laptop
How to Screenshot on Dell? Well, it is as easy as pressing a key on the keyboard. To take a screenshot on a Dell Desktop or Laptop, you need to find the print screen key. It has various names for the print screen key on the keyboard. You can look for PrintScreen, PrntScrn, PrntScr, PrtScn, PrtScr, PrtSc, or anything similar. It is usually found on the F10 key.
If you do not find any key similar to this, you can use the Alt+Insert combination keys. Now, to take the screenshot you need to open the screen you wish to screenshot. While you are accessing the screen, click on the print screen key, and the entire screen is caught as a screenshot. To view the screenshot image, open the Paint app and paste it using Ctrl+V. Now save the image on the Paint app.
Another option for How to screenshot on Dell is to do it manually. Yfou can take a screenshot and save it directly as PNG without pasting it to the image editor app. For this, you need to access the screen you want to capture. On the keyboard, press Windows+Print screen keys together. This will save the screenshot as a PNG file. The PNG file is located at the address – C:\Users\USERNAME\Pictures\Screenshots.
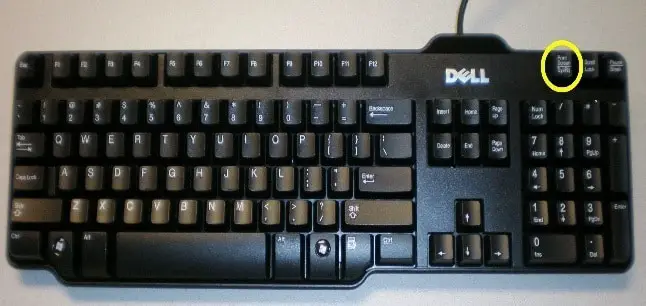
Fig. 4 – Print Screen Key on Keyboard
How to Identify Dell Motherboards
The Dell system operates only with Dell parts. Therefore, it is important to identify a Dell Motherboard if you need a replacement. Follow these steps to identify a Dell motherboard.
- Motherboards usually will have the model number and name of the manufacturer printed on the motherboard, on the socket, or the CPU slot.
- Using FCC number to identify the motherboard. All parts of the computer come with code. FCC code is a combination of company code, dash, and code of the equipment. This number can appear anywhere on the motherboard.
- Once you find the FCC number, go to the FCC ID search page and key in the FCC number. The search will result in the manufacturer from the company code. Once you know the manufacturer, you can visit their website for the Motherboard information.
- Using BIOS number: If you cannot find the FCC number, you can look for a BIOS number. As you restart the computer, it starts to boot up when the BIOS number is displayed, pause, and note down the BIOS number. You can look up for motherboard manufacturers using the BIOS number search engine.
Dell Service Tag Lookup
The Service Tag assists you to find drivers and online services for the computers and also helps to reset passwords. Service Tag is a unique number given by the Dell company to all its products. To lookup for a Dell Service Tag, go to the Windows search bar and type cmd. Select command prompt from the results and type “wmic bios get a serial number†in the Command Prompt bar and press enter. A serial number appears on the window, which is the Service Tag.
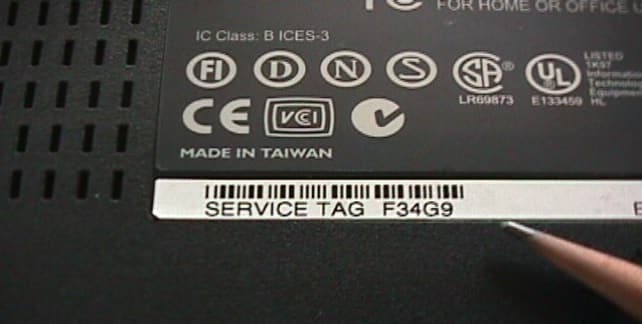
Fig. 5 – Service Tag
How to Program the Buttons on my Dell Keyboard
Programming the buttons or hotkeys helps in performing tasks faster and easier. Follow the steps below to program buttons:
- Go to the windows button on your Computer and click on Programs or All Programs. This displays all the applications on the system. Choose “Dell Touch Programmable Keys†and double click on it.
- Choose the key you wish to program in the “Configure Button†screen. Once the key is chosen, it automatically displays the second page.
- Click on the “Functions†menu. It has a drop-down menu that becomes active, and you can select a function from the list you wish to program such as open “My Computers†folder, etc.
- Choose the “Launch Application or website†option if you want to launch an application by pressing the key or opening a specific webpage. You can either type the URL of the webpage you want the button to open or click on “Browse†to fetch the file you want the key to launching.
- Click “Ok†and the buttons are programmed and ready to use.
How to Update Dell Bios Key on Dell Laptop without Charged Battery
There are instances where you need to update Dell BIOS key on your laptop without a charged battery. This usually helps to check whether the charger is to be replaced or the battery. To update Dell BIOS key on Dell Laptop following steps need to be followed.
- Download the latest Dell BIOS Key (upgrade file) and save it on your laptop or desktop, so that it is easier to access.
- Then, click on the “Start†button and in the run prompt, type “cmd†and right-click on the command prompt and select “Run as administrator.â€
- In the command prompt after “C:\Users” UserName”> type cd desktop and press enter. This will take you to the desktop.
- Therafter, in the command prompt at “C\Users” UserNames”\desktop> type the name of the BIOS file followed by “/forceitâ€. The command will look like this C:\Users”UserName”\desktop>D430_A10.EXE /forceit.
- Press the “Enter†key and the Dell BIOS key will be updated.
Also Read:
Toll-Free Number - Types, Vanity Number, How to Dial Toll-Free Number
How Does PayPal Work-What is It, How to Setup, Types of PayPal Account
Element TV - TV Series, How to Troubleshoot Roku TV
We Suggest to Visit PokingPooh - Your Virtual Lounge for Day to Day Topics
Love your content Awesome,This is the very useful knowledge.
Посетите наш [url=https://grel-3dpt.ru/]Интернет магазин 3D принтеров[/url], чтобы найти идеальное оборудование для ваших творческих проектов!
мы предлагаем – мы предоставляем
Найдите идеальный вариант для своего бизнеса и [url=https://klpl3r.ru/]slm 3d принтер купить|3д принтер slm купить|slm принтер по металлу купить|slm принтер купить[/url] уже сегодня!
В интернет-сообществах можно найти ответы на распространенные вопросы.
Thanks for sharing. I read many of your blog posts, cool, your blog is very good.
Современные решения в сфере [url=https://ead-mmc.ru/]программа для автоматизации логистики[/url] помогают значительно повысить эффективность и сократить затраты на перевозку и хранение товаров.
Это поможет избежать лишних затрат и ошибок.
[url=https://metr3s-vd.ru/]3d принтер по металлу купить[/url] обеспечивает высокую точность и качество изделий, что делает его идеальным выбором для промышленных потребностей.
3D принтер по металлу — это удивительное устройство, способное revolutionize индустрию. Каждый год развивается множество инноваций, которые поддерживают процесс печати. Технологии 3D печати по металлу все чаще внедряются в различных отраслях.
3D печать металла открывает новые возможности для инженеров. С помощью эту технологию, можно изготавливать сложные детали с высокой точностью. Также, процессы стали более эффективными и экономичными. В результате, это дает возможность сократить время на производство и снизить затраты.
Процессы 3D печати металла основаны на аддитивном подходе, где каждый слой добавляется последовательно. Эта методика дает возможность создавать объекты, которые невозможно изготовить другими способами. Ключевым моментом становится контроль качества на каждом этапе изготовления детали.
Развитие аддитивных технологий выглядит очень многообещающим. По мере развития технологии совершенствуются, и появляются новые решения. Такое возможности для новых проектов и улучшает существующие. В ближайшее время мы можем ожидать доступности 3D принтеров по металлу на рынке.
[url=https://prf-3gscnr.ru/]профессиональные 3d сканеры[/url] предоставляют высококачественное 3D моделирование, обеспечивая точность и детализацию для различных профессиональных сфер.
В последние годы профессиональные 3D сканеры приобрели огромную популярность.
[url=https://prom3g-rty.ru/]Промышленный 3D принтер[/url] открывает новые горизонты для производств, позволяя создавать сложные детали с высокой точностью и эффективностью.
При их помощи можно создавать детали и изделия сложной формы. Многочисленные компании
I don’t think the title of your article matches the content lol. Just kidding, mainly because I had some doubts after reading the article.
[url=https://prbn-sknr1.ru/]Промышленные 3D сканеры[/url] становятся всё более востребованными в производственной сфере благодаря своей точности и эффективности.
Существует несколько типов промышленных 3D сканеров, каждая из которых имеет свои особенности.
[url=https://4fscan-r55.ru/]3д сканер купить[/url]
При выборе 3D-сканера важно знать, на что следует обратить внимание.
Современные решения в сфере [url=https://ead-mmc.ru/]программа автоматизации логистики[/url] помогают значительно повысить эффективность и сократить затраты на перевозку и хранение товаров.
Система автоматизации значительно упрощает рутинные задачи.
Can you be more specific about the content of your article? After reading it, I still have some doubts. Hope you can help me.
accept credit cards by phone [url=https://otvetnow.ru]https://otvetnow.ru[/url] mdd medical device
magnificent post, very informative. I wonder why the other experts of this sector don’t notice this. You should continue your writing. I’m confident, you’ve a great readers’ base already!
66B được cấp giấy phép hoạt động bởi các cơ quan quản lý cá cược quốc tế, như PAGCOR (Philippine Amusement and Gaming Corporation) và Curacao eGaming. Điều này không chỉ chứng tỏ rằng 66B tuân thủ các quy định nghiêm ngặt về cá cược mà còn đảm bảo rằng người chơi sẽ được bảo vệ quyền lợi hợp pháp. TONY03-11O
Hello my friend! I want to say that this article is amazing, great written and come with approximately all significant infos. I’d like to look extra posts like this .
Hey there, You’ve done a great job. I will definitely digg it and in my view recommend to my friends. I’m sure they’ll be benefited from this site.
I have read some just right stuff here. Certainly price bookmarking for revisiting. I surprise how much attempt you put to create such a excellent informative site.
Your point of view caught my eye and was very interesting. Thanks. I have a question for you.